











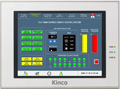
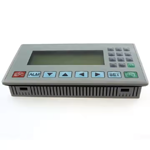


- Industrie-LCD-Display
-
Industrial Products
- DC Servo Drive
- AC Servo Drive
- PCB
- Siemens
- Switch Sensor
- Näherungsschalter
- Temperaturregler
- Schutzrelais
- Fiber Optic Sensor
- Encoder
- Fan
- other
- Heidelberg
- MITSUBISHI
- FANUC
- Siemens adapter
- Fujitsu connector
- Der Aufsichtsrat
- Board
- Contactor
- Circuit
- Omron
- Relais.
- Motortreiber
- power supply
- Cable
- Transformator
- HMI Touch-Glas
-
HMI-Vollautomat Ganze Einheit
- OMRON HMI Touch Panel
- Siemens HMI Touch Panel
- Mitsubishi HMI Touch Panel
- Allen-Bradley Automatisierung HMI Touch
- DELTA HMI Touch Panel
- EVIEW DELTA HMI Touch Panel
- KINCO DELTA HMI Touch Panel
- HITECH HMI Touch Panel
- WEINTECK HMI Touch Panel
- TECVIEW HMI Touch Panel
- WEINVIEW HMI Touch Panel
- PANASONIC HMI Touch Panel
- KYOCERA HMI Touch Panel
- SCHNEIDER HMI Touch Panel
- Module
- LCD Wechselrichter
- Membran Tastenfeld Schalter
- Winni Touch Screens
- Frequenzumrichter
- Servo Motor
- PLC
In 2026, the standard for gaming and high-performance laptops has shifted significantly. While 60Hz panels are becoming obsolete for demanding tasks, 144Hz has officially become the new sweet spot for buttery-smooth gameplay and fluid productivity. If you are still staring at a laggy 60Hz display, you don't necessarily need to buy a brand-new laptop. Upgrading your existing laptop screen to a high-refresh-rate panel is a cost-effective and rewarding DIY project.Here is your comprehensive guide on how to upgrade your laptop to a 144Hz screen in 2026.

1. Why Upgrade to 144Hz?
The jump from 60Hz to 144Hz is arguably the most noticeable visual upgrade you can make. In fast-paced games, a 144Hz monitor reduces screen tearing, minimizes motion blur, and drastically lowers input lag. For creative professionals, scrolling through timelines and high-res images feels significantly more responsive.
2. Check Compatibility First
Before purchasing a replacement screen, you must verify your laptop's compatibility:
Connector Type:Most modern 15.6-inch gaming laptops use a 40-pin eDP (Embedded DisplayPort) connector.
Resolution and Refresh Rate Limits:Ensure your laptop's GPU and internal display cable can support 1920x1080 (FHD) at 144Hz.
Physical Dimensions:Check the mounting brackets, screw hole positions, and bezel thickness.
3. The Top Pick for 2026: LP156WFG-SPF2
When browsing for a reliable 15.6-inch 144Hz replacement panel, theLP156WFG-SPF2stands out as a premium choice in 2026. Known for its excellent IPS color reproduction, wide viewing angles, and true 144Hz refresh rate, this panel fits seamlessly into a wide variety of gaming laptops (including popular models from Acer, ASUS, Lenovo, and MSI). It delivers vibrant visuals and ultra-fast response times, making it the ultimate upgrade for gamers and designers alike.
4. Step-by-Step Upgrade Guide
Preparation:Power off your laptop completely and unplug it. Remove the bottom case anddisconnect the batteryfor safety.
Remove the Bezel:Carefully pry off the plastic bezel surrounding the screen using a plastic spudger to avoid scratching the plastic.
Unscrew the Panel:Remove the screws holding the old LCD panel to the metal brackets.
Disconnect the Cable:Lay the panel face down on the keyboard, gently peel back the tape on the back, and unplug the 40-pin eDP display cable.
Install the New Screen:Connect the cable to your newLP156WFG-SPF2panel, secure it with screws, and snap the bezel back into place.
Power On and Set Refresh Rate:Boot up your laptop, go toWindows Display Settings > Advanced Display Settings, and select 144Hz to unlock the full potential of your new screen.
Upgrading your laptop screen is easier than you might think. With the right tools and a high-quality panel, you can breathe new life into your trusty machine and enjoy top-tier visual performance without breaking the bank.





